Before you get started on a do-it-yourself PC, you have to select the components that you are going to use. Some of the things you will need to make choices about are listed below. If you are planning to use some of your current hardware in the new PC, that may limit some of your choices with the other items listed.
The place to start is with
the processor. All processors have advantages and disadvantages. The main
types of processors on the market right now are Intel’s Pentium 4, Pentium III
and Celeron and AMD’s Athlon, Duron and Athlon XP+. Personally, I like AMD’s
Athlon XP+ for its price and performance.
You choice of processor will
help decide which motherboard you can use; manufacturers use differing pin
layouts on their CPUs. There are many websites that can help you choose a
motherboard. Some of my favorites are Tom’s Hardware Guide at
http://www.TigerDirect.com,
http://www.TomsHardware.com and
AnandTech at
http://www.AnandTech.com.
Once you have narrowed down which motherboards you are considering, it is time to look at some of the other components. Hard drives come in 2 major types IDE (EIDE) and SCSI. Since SCSI drives are used primarily in servers I will focus on IDE drives here. Currently, IDE drives have a few differentiating features: rotational speed (RPM), interface speed (ATA spec), cache size and storage size. Here are some basics to help you select a hard drive:
The interface specifications
of your hard drive(s) can influence your motherboard choices. For example,
currently the fastest hard drives support the ATA/133 specification, but not
many motherboards support it. So if you want one of these drives (and want it
to work in ATA/133 mode) then your motherboard needs to have ATA/133 controllers
or you will need to add a 3rd party IDE controller.
I need to add here that most
motherboards have 2 IDE ports that can support a maximum of 4 IDE or ATAPI
devices (2 per cable). If you want to use more than 4 Hard Drives, CD Drives or
Zip drives then you will need more than 2 IDE ports. You can either add a 3rd
party IDE controller or purchase a motherboard that has an IDE RAID controller
(it adds 2 additional IDE ports). RAID stands for Redundant Array of
Inexpensive Disks. RAID controllers are pretty cool; in their IDE
implementation, they usually support RAID 0, 1, 0+1 and JBOD. RAID 0 means
that the disks are striped, meaning that they appear as one big disk to the
Operating System, but are written and read from alternately for speed. RAID 1
means that two drives are mirrored and the same data appears on both. RAID 0+1
means that two drives are striped and then another drive or drives mirrors the
striped array. JBOD (Just a Bunch Of Disks) means that multiple drives appear
as one huge disk to the operating system.
Now we come to RAM. Your
motherboard choice will determine what kind of RAM you can use. For more
information on RAM, you can read my article
RAM, RAM I Need More RAM
in Volume 2 of ABC.
The next component on our
list is the Video Card. If you are a gamer, you probably already know what
video card you want. A good 3D accelerating Video Card can cost more than a
processor. Currently the fastest Video Cards are available in AGP versions
only. Make sure that you check with places Tom’s Hardware Guide and AnandTech
before you make your Video Card Choice, some motherboards may have a problems
with certain Video Cards.
Now we have most of the rest of the peripherals, things like CD and DVD ROM drives, CDRW drive, floppy drives, Sound Card, Network Card and Modem. Read my article on System Requirements in Volume 5 of ABC to learn how to match these to your system. Here are some general guidelines:
Last but not least are the case and the power supply. For all modern PCs, I recommend a high quality power supply. If you are building an Athlon based PC, AMD has a page with power supply recommendations.
For the case, it is possible
to get a $30 case that includes a power supply, but I can’t recommend them. The
power supply is usually very low-end and may not provide enough power. Cheap
cases also usually have sharp edges, poor hardware layout and may not provide
adequate cooling. If you’re building your own PC, you will be much happier (and
have fewer cuts on your hands!) if you go with a quality case.
For all components I
recommend that you go with major manufacturers with well-known names. It is a
good idea to ask around and see if, in general, people have had good or bad
experiences with the specific items you’re interested in. I would also make
sure that items you are interested in have drivers for, and are supported in,
your choice of an Operating System.
I used 3 PCs in the
following pictures, one is the test box that I used for the
article on Windows
XP in Volume 6 of ABC and the other 2
were being made for customers. I would like to thank both Ross Johnson and
Martha Bagwell for allowing me to use their PCs for pictures in this article.
These are the components I used in these pictures:
Now that you’ve chosen the
components lets start building!
Caution!!! You need to worry about static electricity. Use an antistatic strap or an antistatic mat. If you accidentally zap one of your expensive components, you may have to replace it.
Get the Case Ready
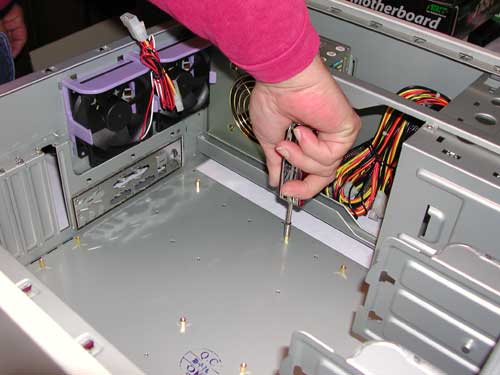
You need to look at the mounting holes in the motherboard,
mount the mounting posts in the matching holes in the case.
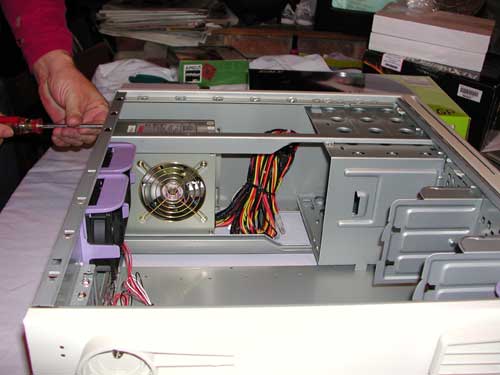
Now mount the power supply in the case. Make sure you have the orientation correct.
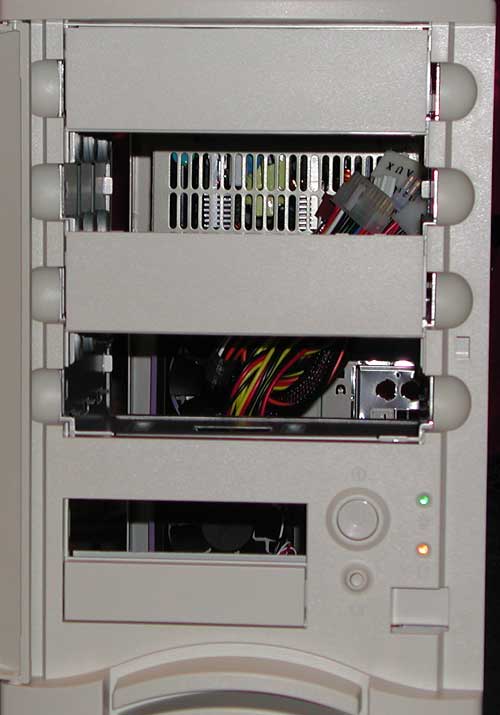
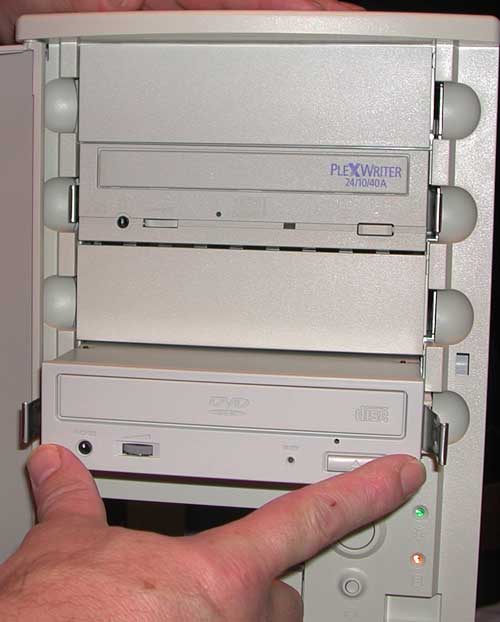
Remove the blanks covering the external bays for the Floppy, CD/DVD ROM, CDRW drives.
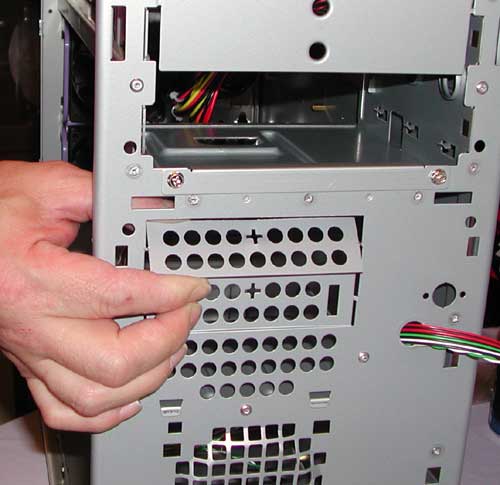
With some cases you need to remove the case front to get at the blanks. It should look like this when you’re done.
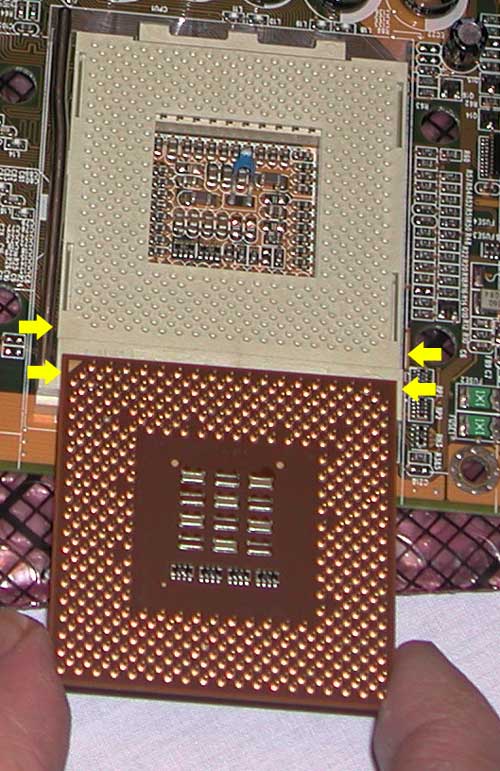
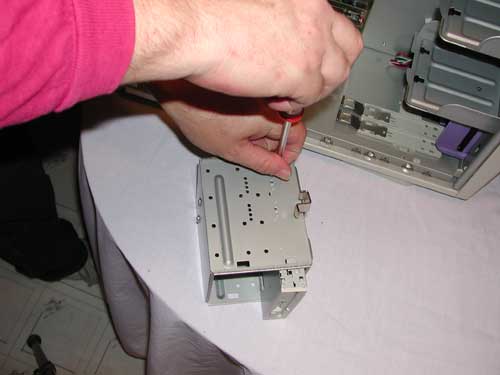
First mount the processor, paying close attention to the orientation of the processor relative to the motherboards socket, the following picture shows the clues for an Athlon processor, note the “flat” corners.
To install the processor,
lift the locking lever and carefully place the processor in the socket. Gently
push the processor down and close the locking lever. Check your motherboard
manual for jumper or dipswitch settings. You may have to set jumpers that
determine the CPU speed and type and even the voltages used by the processor.
Most of the motherboards I use are jumperless and these settings are handled by
the BIOS.
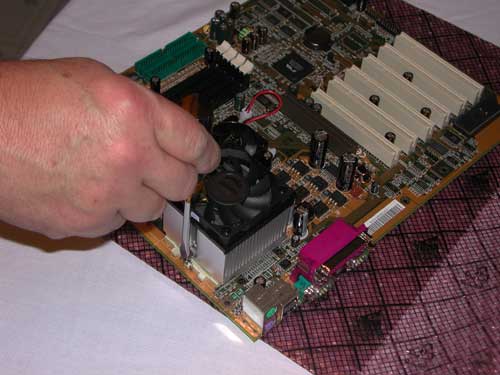
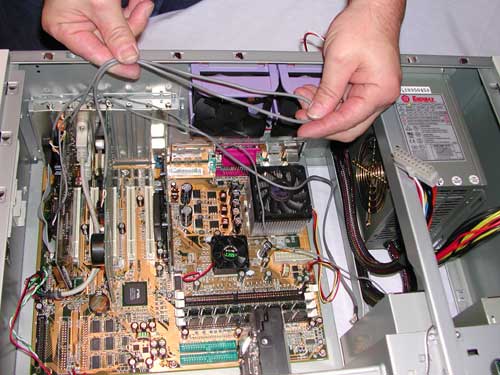
Install the processor cooling fan. Before you install the processor fan you need to make sure that there is thermal paste between the processor and heat sink. Personally I prefer Artic Silver. All you need is a thin layer of thermal paste. If there is a pre-made pad on the heat sink, you can remove it with alcohol. Just make sure that you remove all traces of the pad and that the alcohol is completely dry before you mount the heat sink and fan. Be very careful installing the heat sink and fan, follow the manufacturer’s instructions.
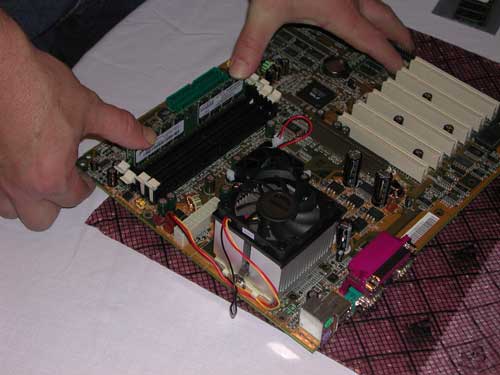
Now install the memory. For details see my article on RAM in Volume 2 of ABC.
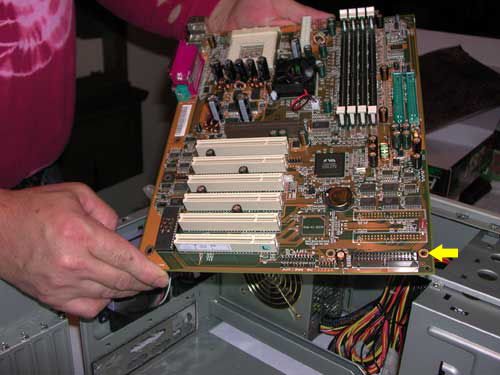
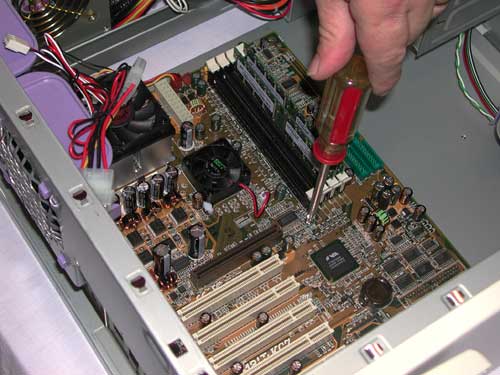
Take your time with this step. Line up the motherboard with the template on the back of the case and press it into position. If doesn’t want to move into place DON’T FORCE IT. Take another look and slowly put it into position. Make sure that you don’t damage the motherboard by sliding it along the mounting posts. After it is positioned, attach it to the case with mounting screws (a high quality case includes all the hardware you will need). Gently tighten the screws a little past finger tight.
My preferred cases use drive rails to mount 5 ¼” drives like DVD ROM drives. Simply attach the rails to the drive. If it doesn’t line up with the front of the case, adjust the position of the rail relative to the drive.
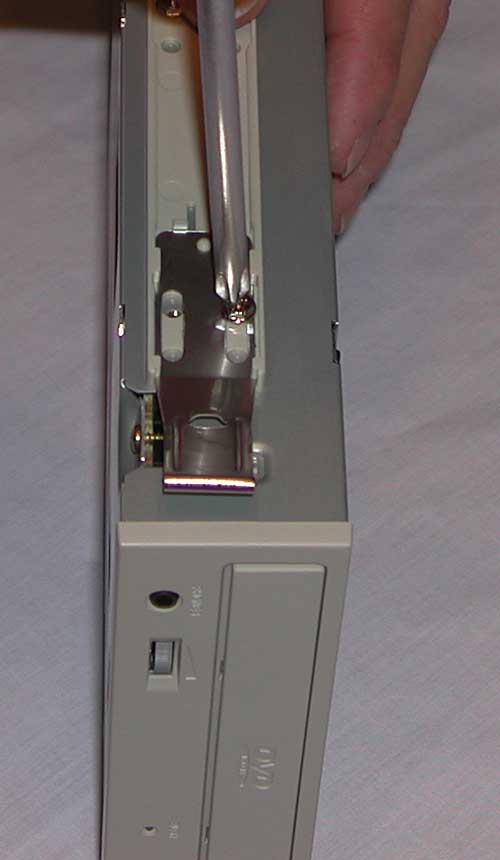
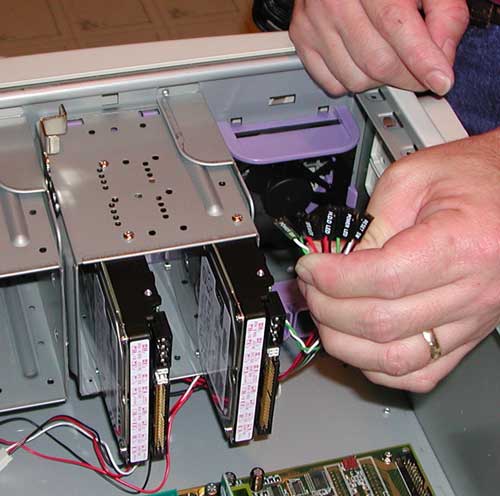
Before you install the drive you will need to check the jumpers. IDE drives can be jumpered one of 4 ways: as Master, Slave, Stand Alone or Cable Select. Not all drives have the Stand Alone position. If you use cable select, your motherboard, drives and cable all must support it. On non-Cable Select systems, if you are using a single drive on an IDE channel it must be jumpered as Stand Alone or Master. If you install two drives, one must be a Master, the other a Slave. When you’re ready to install the 5 ¼” drive, you just slide the drive into the case from the front.
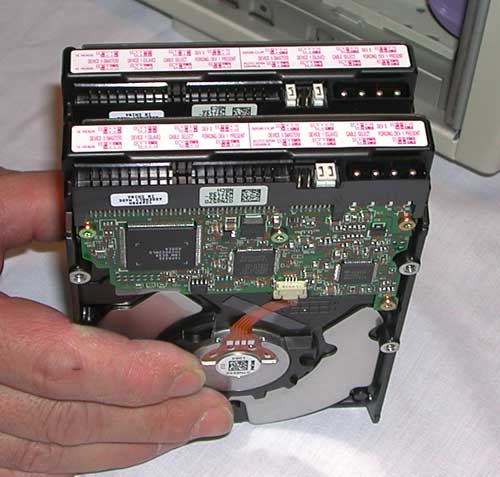
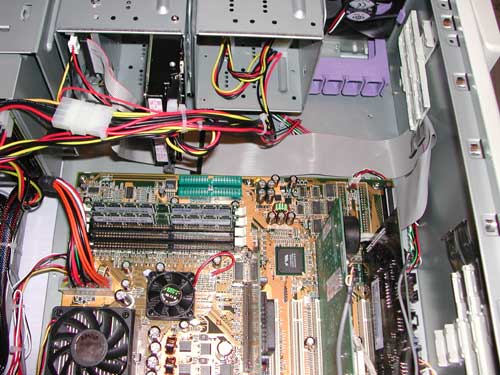
For floppy and hard drives I prefer cases that use removable drive cages. Again, if the front of the Floppy drive doesn’t line up with the front of the case, simply adjust the drive in its cage or bracket. For the hard drive(s), again, it must be jumpered like any other IDE device.
After you have the drives mounted in their cage(s), install the cage(s) into the case.
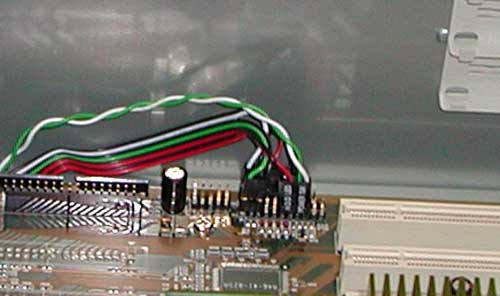
Connecting Wires to the Motherboard.
You need to connect the motherboard to the case; most cases have a small bundle of wires (that are hopefully labeled) that need to connect to certain pins on the motherboard. These control the Power Switch, Reset Switch, Speaker and front panel lights. Now it is time to use the motherboard manual to determine where they go.
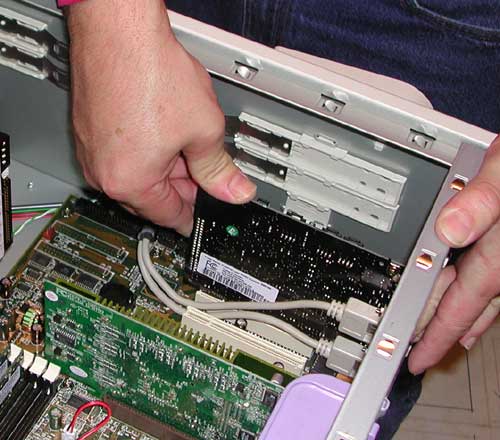
Now install your peripherals cards. Before you start, check your motherboard manual for a PCI IRQ map. Try not to install cards in slots that share IRQs. If you must share an IRQ, avoid slots that share an IRQ with the AGP slot or the IDE controller(s).
There are lots of wires inside a computer connecting various items. There are so many they can have serious impact on cooling performance. A haphazard cable layout can interfere with proper airflow inside the computer. Most cases are designed to have air enter the bottom front and exit from the top rear.
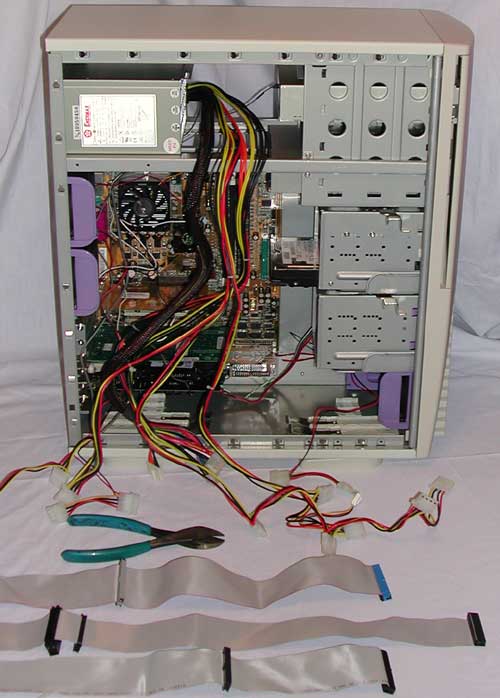
At this point I connect all the rest of the wires to take a look at how they can be routed. Some things to pay attention to:
When you run the IDE cables, think Origami (yeah, paper folding) to get them out of the way of the air flow. Remember that air should flow from the bottom front of the case to the top rear.
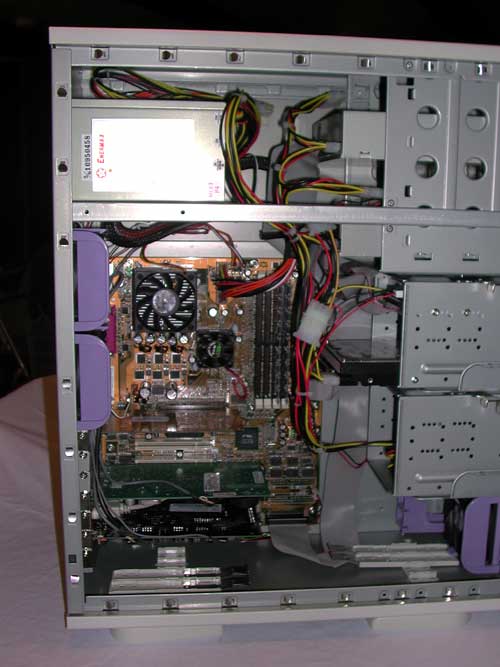
When you’re done you should see a clean path from the bottom front of your PC to the top rear.
Connect a Keyboard and
Mouse, Monitor and a power cable. Insert a bootable floppy disk in to drive A:.
Now, you’re ready to boot the PC. Turn it on. Go into the BIOS settings and
adjust them to the requirements of your new PC. Make sure that you have it set
to boot from the floppy. Save and exit the
CMOS
Settings and allow your PC to reboot. If the floppy drive doesn’t work, try
reversing the drive cable (move the red line to the other side of the drive).
If the PC won’t power on, try reversing the orientation of the power switch
connection from the case. The same trick also can help if the LEDs on the front
of the case aren’t working.
If everything is working, close up the case and admire your new PC. You can now make it useful by installing an Operating System.
DannyChesnut.com Privacy Policy, Disclaimer, and Legal Stuff